Product Review: Carmate SIV Wheel Coat and First Play with a Foam Lance!
UPDATE: New comparison of different wheel protectants.
Hello again folks! Here's a product review of Carmate's SIV Wheel Coat. I purchased it from Autobacs during my trip to Singapore a few months back. I was so impressed with Carmate's Black Resin Restore, that I just had to try another Carmate product.
So I bought what seems to be a wheel coating, and compared it against Poorboys Wheel Sealant. Check out the results after the jump.

BONUS! Some pictures of the 'foam party' held at Fishbonez' Auto Detailing Theme Park. Check them all out after the jump!
So first up, is the review of Carmate SIV Wheel Coat.
Purchased this for SGD27.20 at Autobacs. (I'm a sucker for auto detailing products with Japanese Kanji on them)
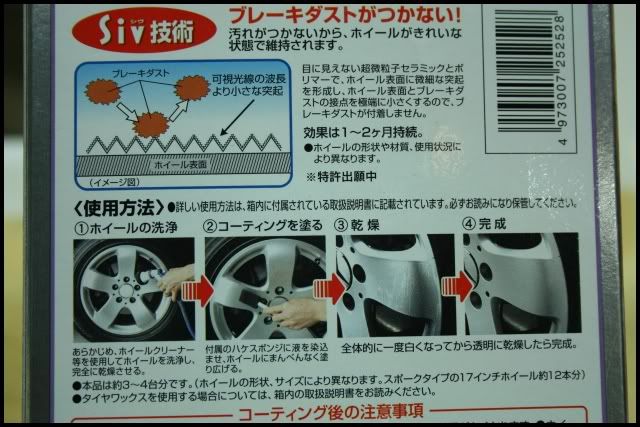
It is a very watery liquid and from the pictures on the side of the box, it looks like it is supposed to repel brake dust.
The back of the box shows the application procedure and included in the box is a foam stick with a few foam refills.
As per my old test for Poorboys Wheel Sealant, I taped half of the wheel and applied SIV Wheel Coat to one side and PB Wheel Sealant to the other.
SIV Wheel Coat took longer to dry to a haze.


After leaving both sides about 30 minutes to dry(it was a cold and humid night), they were then buffed off.

Poorboys Wheel Sealant came off with ease as usual and left a smooth, slick and shiny finish.
Carmate SIV Wheel Coat however, was quite difficult to buff off and no matter how hard I wipe, all of it wouldn't come off, as you can see the reflection of the light is not as complete as the reflection on the Poorboys Wheel Sealant side.
Fast forward 1 month without washing the wheels,


Both sides had brake dust on them, but the Carmate SIV Wheel Coat side looks like it had less brake dust. On the other wheel however, both sides were the same. So I can't comment on whether it actually repels brake dust.
I then rinsed the wheel with a pressure washer.

This is where a difference is shown.
On the Poorboys Wheel Sealant side, I spent quite some time rinsing the wheel in that specific spot, but the brake dust had to be physically agitated to be removed.
On the side coated with Carmate SIV Wheel Coat however, most of the brake dust was rinsed off easly.
After washing the wheel with car shampoo, the side with SIV Wheel Coated beaded water better than Poorboys Wheel Sealant.

In conclusion, I would rate Carmate SIV Wheel Coat as high on protection and durability, but low on user friendliness.
Again, there is a compromise between these three factors, similar to my Paint Protectant Triangle Dilemma(PPTD) 'theory'.
Would I recommend SIV Wheel Coat? Probably not at the moment, until I find the correct application method.
Okay, next we have some pictures from the recent 'foam party', haha!
We had a variety of ammo to choose from to load into our weapon, the foam cannon(U.S term), also known as the foam lance in the U.K.
I do not have any pics, but we actually used the foam gun first before playing with the foam lance. The foam gun attaches to the garden hose and does not need a pressure washer.
Even with the foam gun, the foam does not stick to the surface, but the paint did appear cleaner after rinsing off the foam! We were quite surprised at this. It still required a hand wash with a mitt touching the paint.
We then played with the foam lance, trying out many different shampoos. Finally we decided to go crazy and overdosed our foam canister with Osren Bubble and Wax shampoo with a ratio of 30% water and 70% shampoo.
It produced massively thick and clingy suds.


While we were fooling around with the foam lance, Joe, our local 'chemist' cracks his head at trying to formulate the world's most premium shampoo.

He added all the shampoos available at the exact volume, this creates a chemical reaction that catalyses and activates the potential sudsing and cleaning power of each shampoo.
He calls it, the VooDoO shampoo.
*cue lightning and thunder effects*


Okay sorry, I'm just playing around. Turns out it didn't clean any better, or suds any better than any other shampoos.
I guess it's best to leave the mixing to the real chemists.
After we got the car squeaky clean, my hands were itching to bring out the rotary buffer, and decided to polish the small bonnet of the Perodua 'test mule' Kelisa.
Process was:
- Meguiar's #85 Diamond Cut Compound 2.0 via Lake Country 4ply white wool pad @ 1200rpm
- Meguiar's #83 Dual-Action Cleaner/Polish via Lake Country White Kompressor pad @ 1200 rpm
- Meguiar's #205 Ultra Finishing Polish via Meguiar's Polishing pad @ 900rpm
- Presta Aurora 3000 Hand Glaze via Lake Country Black Finishing pad @ 600rpm
Here are the results,


Mmmmm, glossy....
'Spirit36' then helped to finish off the roof using the same process. He handles the buffer as if he is holding a light plastic toy.
While 'Jackson' AIO-ed the rest of the car with Duragloss #501 Marine/RV Polish on one half and Jeff's Werkstatt Prime:Acrylic on the other.
Thanks for coming guys, your company is always enjoyed.
P.S Will need to think on how to do a full review on the foam gun and foam lance/cannon. Do you have any suggestions on how I should fully test their capabilities?
Thanks for looking as always!
Kenneth/Fishbonez signing out..... *pshhhht*
^^V
Read more!


